Off to the Machine sShop

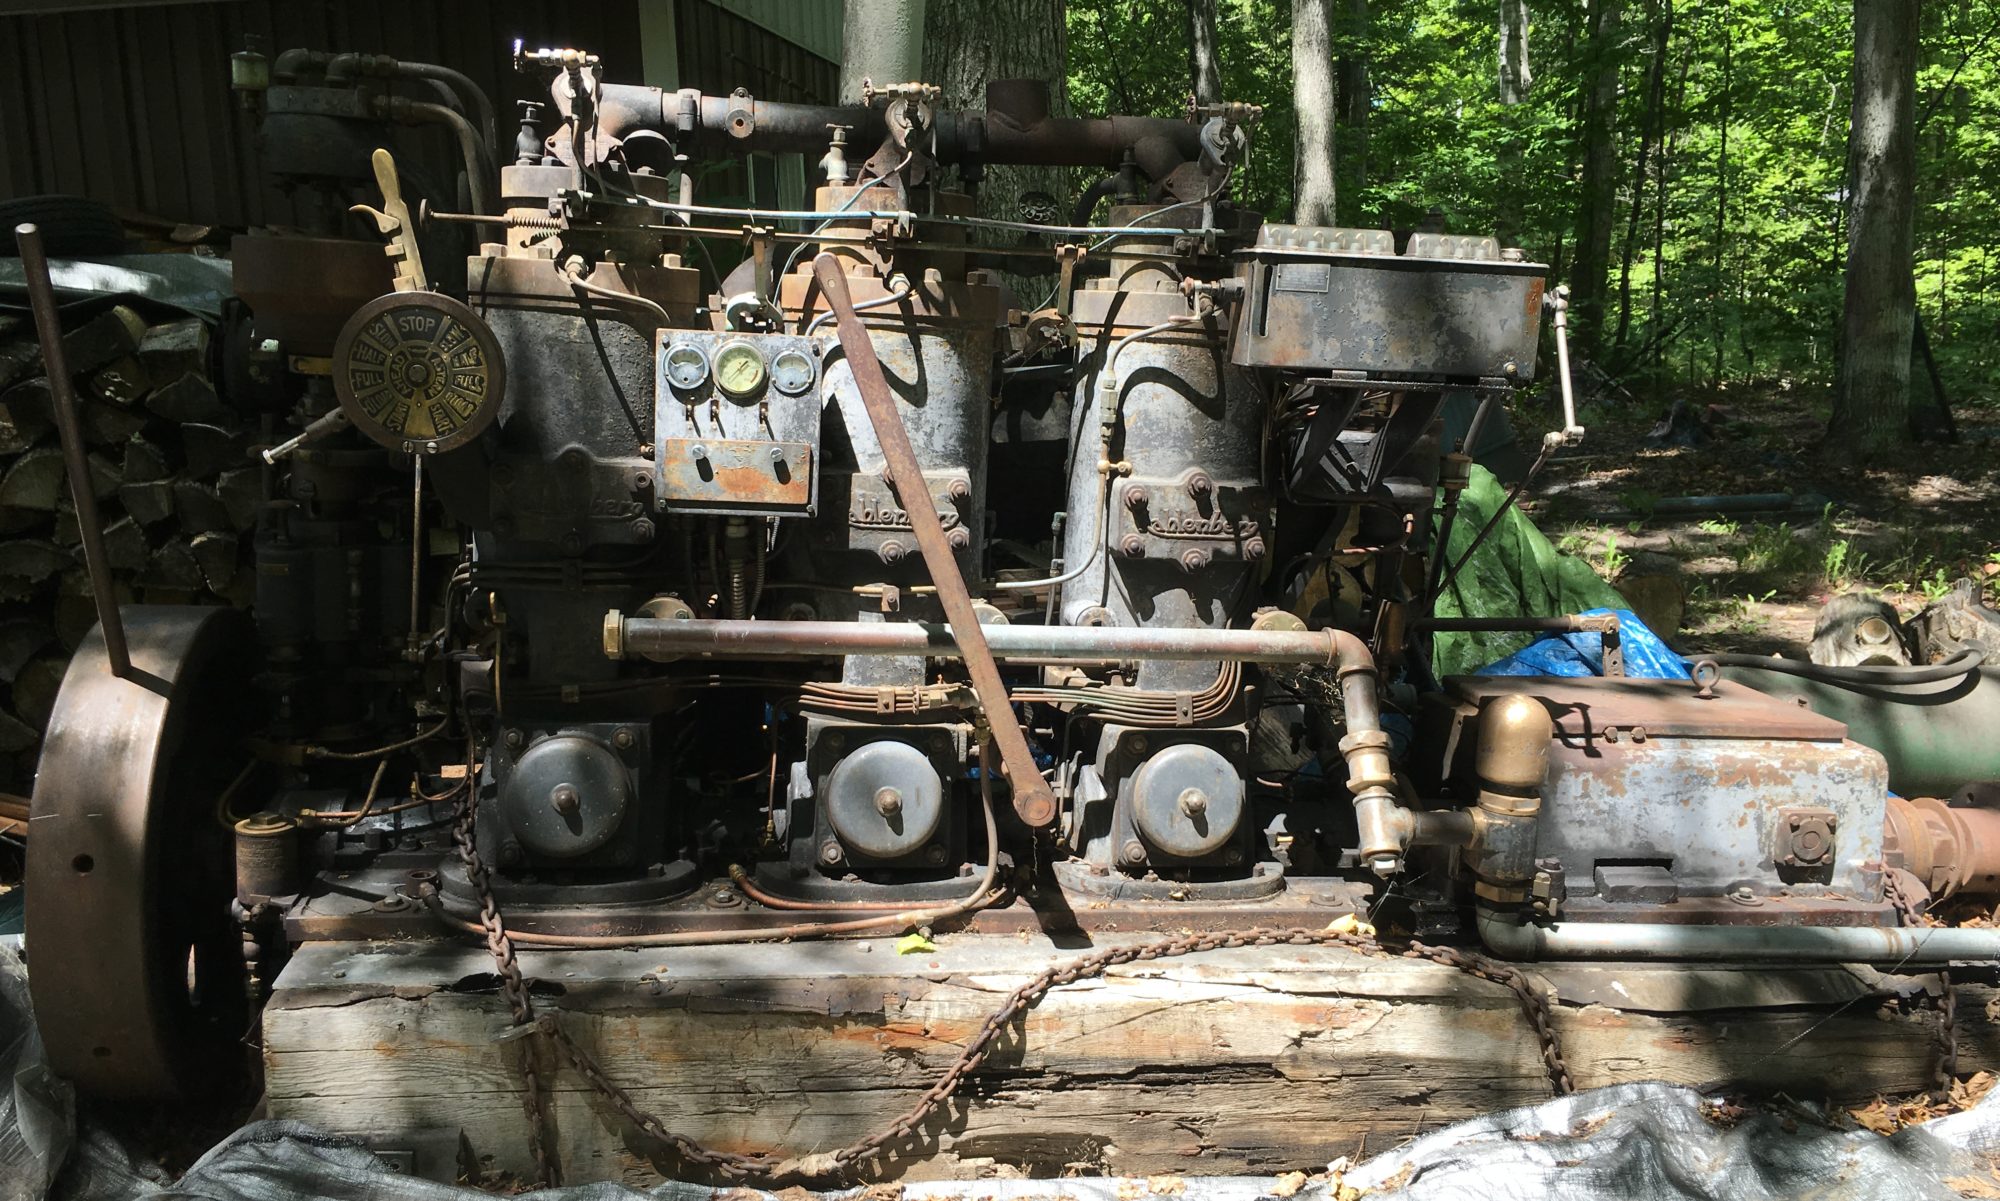
I finally got the engine stripped down to the point of being ready for the welding repairs.  The pieces that need welding are not on the engine block but the block is necessary to be able to accurately repair the broken parts.  So the engine went back up on wheels.  Much easier the second time around.

I didn’t lift it with the crane because I don’t trust the rotted wood beams so it was done, again, with jacks.  Soon it will need to get mounted on something more substantial.

With a little help, the engine was rolled onto my trailer, fastened down and transported to the machine shop.  They had better tools than I did for moving the engine.

Once they lifted the engine up, I drove out from under it.  Piece of cake.

The machine shop has made jigs which match the layout of the block so the parts to be repaired can be mounted and welded straight.  Actually, the cast iron will be brazed rather than welded.

The second part of the repairs involved the cylinders.  There is a substantial ridge on the cylinders at the top of the piston ring line where cylinder wear has occurred.  This kept me from removing the pistons out the top of the cylinders as I didn’t want to risk damaging the rings.  A ridge reamer is what I have used in the past on other engines but I could not find one for 8-1/2″ cylinders!  The other option was to lift the cylinders off the block to free the pistons but I am limited by ceiling height in my shop.  The machine shop will use a custom hone to break the ridge or put the cylinders on a horizontal mill if necessary.

The machine shop has had the engine for over two months now but I’m not in a hurry.  We are in the process of moving to a new house which doesn’t (yet) have a suitable shop, so I have no place (or time) to work on the engine for a while.  It is likely the project will go dormant while I build a new shop which may not be ready for six months or more.  There is plenty to do with all the parts currently on my bench but these will be crated up soon.  And I currently have no idea where I’ll put the engine in the meantime.

All part of the adventure.

Shrinking Engine

I’ve been focusing more time the past few weeks in order to get the welding repairs done before winter sets in. I’ll have to put the engine back on wheels and up on the trailer for the trip to/from the machine shop that will be doing the repairs. The plan is to strip it down to just the base for that trip so the cylinders need to come off. Before doing that, the exhaust manifold needs to come off. Before doing that, I had to remove that four broken bolts that held on the exhaust end plates.

The broken bolts were drilled and multiple attempts were made with a big screw extractor. Didn’t budge. So I had to drill out as big as possible without nicking the threads then hand grind with a Dremel and a carbide bit to get even closer.  At that point I could carefully cut the threads with a tap to extract the last remains of the old bolt.  It took two nights but now good to go with no damage to the manifold.

Next up was removing the manifold itself. This only took a few minutes. I had been hitting the nuts with penetrating oil for nearly a year and they came off without a fight. Not sure how I made it this far in life without a crane. Angels were singing.

Removing the exhaust manifold
Exhaust manifold


Headless for Halloween

The shop was quiet most of the summer but now that the kids are out of the house I’ve had opportunities to ‘get back at it’. In September I made a jig to remove the head which is really nothing more than a one inch thick steel plate about 14″ square. Holes were drilled to line up with the studs for the cylinder head cap studs and the head studs (which took a whole night). The idea was to bolt the plate to the cap head and jack up the entire head by systematically tightening the nuts on underside of the plate. A picture would likely explain it much better than these words.
Removing the head with shop-made tool

The first attempt failed. I intentionally used cheap Chinese hardware from Fleetfarm on the plate. The thinking was that the heads might be on very tight and if something was going to fail while forcing the head, I wanted it to be something other than any Kahlenberg parts. The crappy nuts stripped and slid up the studs. My safety net worked but the head was still on the cylinder.

I spent the next month or so trying to come up with a better idea but nothing was materializing. Kurt happened to call me and sent over pictures of the similar method he used which went well. The idea to use the plate was originally his, and I put my own spin on it. He encouraged me to try it again. I used better hardware and this time it worked! By the time I got to the third head it only took a few minutes to have it off.

The crane came in handy.  Those heads are heavy.

The pistons will need to come off next but I want to remove the exhaust manifold first.  And before I remove the manifold I need to deal with the 4 broken bolts on the end caps. Predictably, drilling and using a big screw extractor failed.  In fact I snapped the tap handle in two in what was now my last attempt with that method. Now it will have to be the slow tedious method.

Broken tap wrench

Another piece of progress was on the air compressor piston.  Three of the four rings were stuck.  This component had suffered water damage and rusted.  The piston has been soaking in penetrant since January.  I used another Kurt technique and managed to free up the rings using a small soft blow hammer.  The rings look to be in very good shape.  This was a nice win.


Now I have a concrete goal

I made a pilgrimage to the Door County Maritime Museum annual boat show this past weekend.  The main attraction for me was to see a running Kahlenberg.  This engine is an annual visitor to the show and draws a good crowd when it is started.  Keith is the owner and was very generous with his time giving me a huge amount of perspective and advice.  I’m frequently asked what I will do with my engine when it is in running (I hope) order.  The answer is now clear.  It’s going in a trailer to be shared with others.

It takes at least 15 minutes to start a cold Kahlenberg.  After all the prerequisite tasks are complete, the torches are fired up for the pre-heating process.


Then with a quick shot of air the engine starts but sometimes not too smoothly.

It quickly settles down and runs well once warmed up near operating temperature.

Internal combustion porn.

Slooooow Progress

There has been little progress made of late due to work, family events and a spring spent working outside on home projects.

I’ve removed additional oil lines and been sporadically cleaning various parts and sub-assemblies. One recent addition to the shop is a gantry crane (The List of Craig) to facilitate the removal of cylinders, which I’m guessing weigh well north of 500 pounds.

I’ve also visited the Maritime Museum in Gills Rock to see Kurt’s Kahlenberg and take many more pictures for reference.  Also had a chance to dimension some parts that I will need to fabricate as these were missing on my engine.

Below are pictures of Kurt’s engine.  I only hope to have mine look half as nice.

Crawling forward

I haven’t had too many days to work on the engine recently.  The new job is demanding and many other priorities.  Also took a week-long trip to visit Kenz in Spain.  But I have had a few hours here and there to pick at it.


The governor shaft is completely out. I’m not sure how it’s going to go back together but hopefully all the pictures and notes will be what I need.

Fuel injector pump housing and main governor shaft gear
Fuel injector pumps
Various components of the governor shaft

Each of these components will be disassembled in time. The first thing I do is give them a rough cleaning in the parts washer. This gets off the major gunk. I then spray them down with WD-40. I’ve discovered that parts coming out of the parts washer will soon start rusting if not protected. So everything is getting a WD-40 bath before being placed on the bench or bagged for future work.

Next I removed the port-side oiler and corresponding oil lines. The oiler will need to be partially disassembled and inspected but it looks to be in good working order with few problems from water.

Air compressor piston with stuck rings

I decided to go back to the air compressor which seems to have suffered some damage from the elements.  It turned out to not be too bad but there are a few problems.  Three of the four rings on the compressor piston are frozen. They have been soaking in penetrate for four weeks and still not budging. Not sure what I’m going to do to get them unstuck.

Fuel filter with crack.

I disassembled the fuel filter and found some bad news. Water had obviously pooled inside the filter. Lots of rust. But worst of all the case is cracked from freezing. It can be repaired but one more thing that will need some focused attention. Luckily it isn’t terminal.

It has become painfully obvious that this engine won’t be running this year. But I knew that was a bit optimistic anyway. Again, no reason to be in a big hurry. Just keeping at it is what is important to me.

Flywheel and Governor Shaft

Setback #00001 did clarify one big question. There was no longer any indecisiveness about whether the governor shaft would have to be completely disassembled. Since the base gearbox casting was cracked the entire shaft and all its components will need to come off. This includes of the intricate sub-assemblies including the air distributor, governor and fuel injection systems. I estimate about 1300 unique part numbers on the entire engine and about half of them are on this shaft. And I have exactly one grainy drawing showing how they all go together. Continue reading “Flywheel and Governor Shaft”

My new best friend

The restoration of Kahlenberg engines is a hobby of a small group. These engines exist in many of the maritime museums around the great lakes. A few more are at old time equipment museums such as Cold Spring Ohio. Some are operational but most are nice cosmetic displays. There is one gentleman who travels around running a Kahlenberg hourly from his trailer at various events and fairs. I have seen reference to running Kahlenbergs as far away as Florida. Continue reading “My new best friend”